
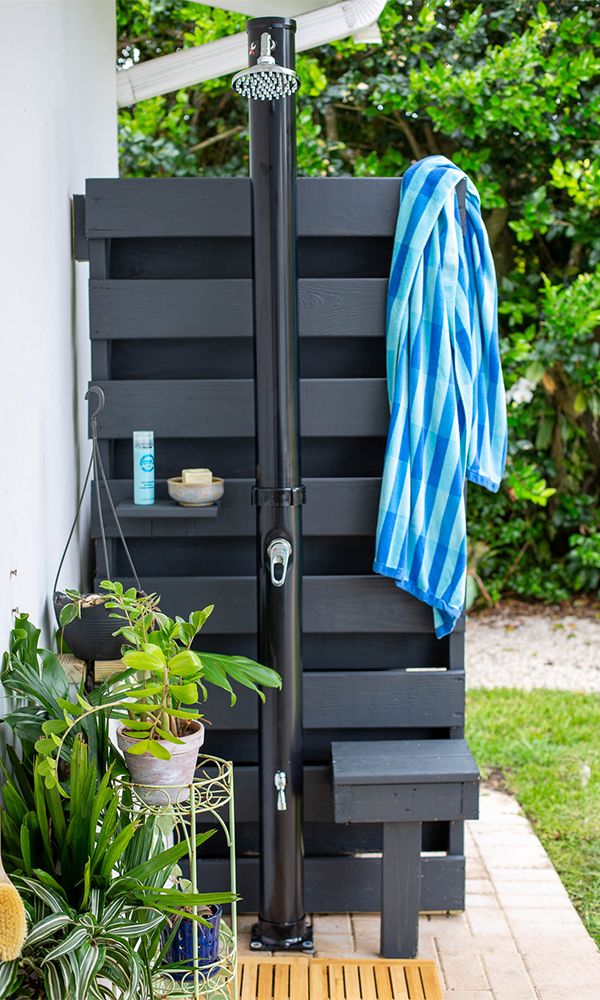
DIY Modern Outdoor Shower
In this post you’ll learn how to build and install a simple, modern-style outdoor shower area that’s perfect for the warmer months. Wash off quickly after yard work with this useful project!
-
Difficulty:Intermediate
-
Team:1-2
-
Time:Over 6 Hours
Tools
-
Pencil
-
Ruler
-
Safety Goggles
-
Screw Drivers
-
Screws
-
Tape Measure


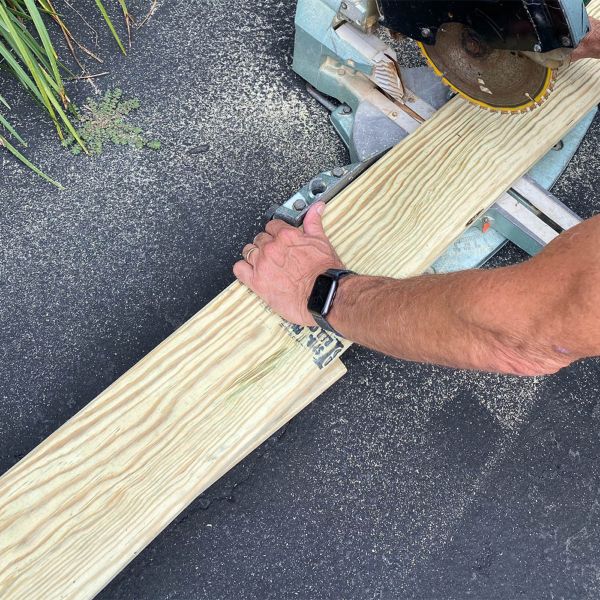
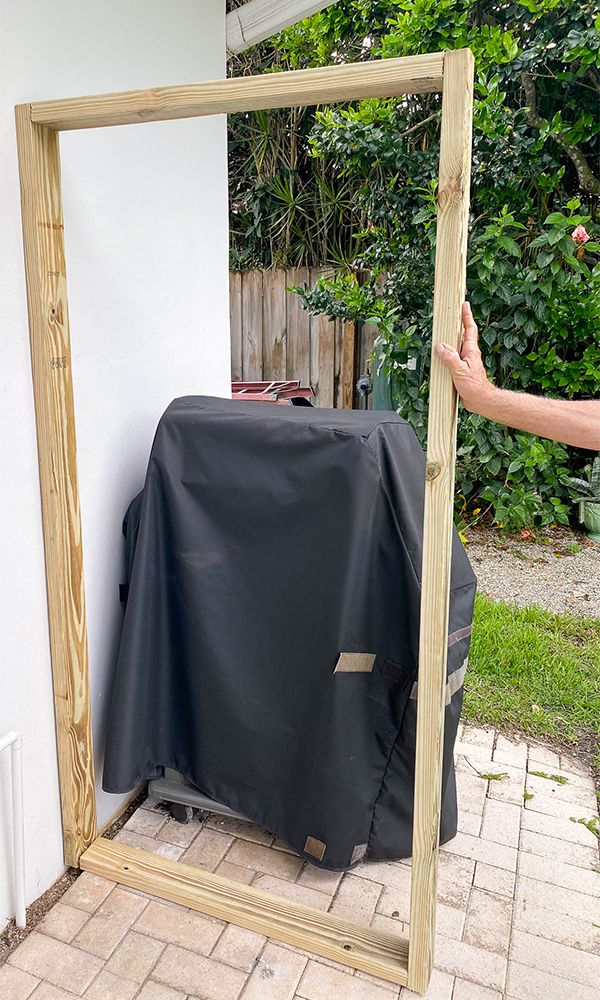
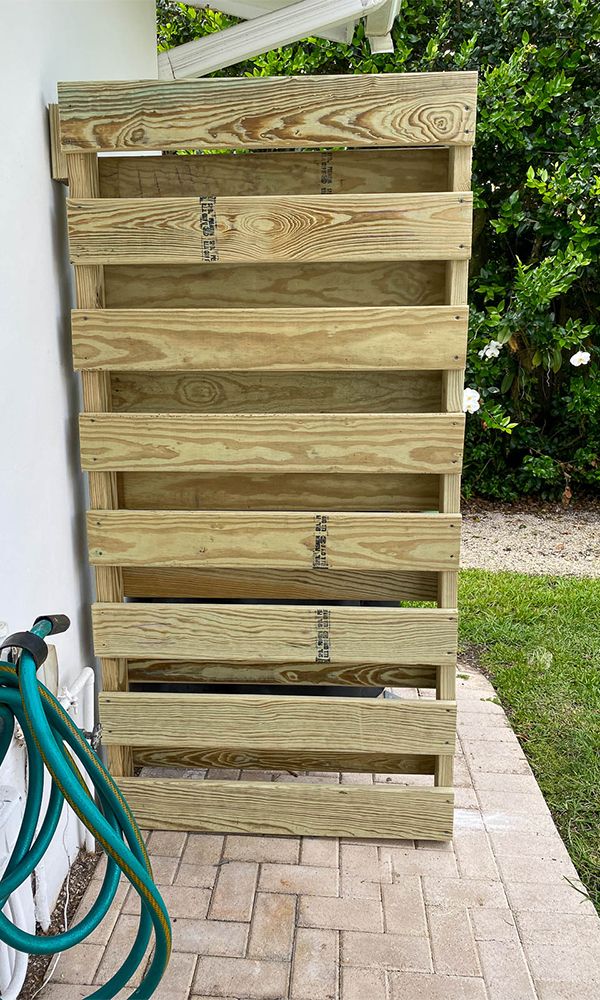
Measure and Cut
Measure and cut two 2 x 4's to 72" and two 2 x 4's to 36" with a circular saw. These will be used to make the frame of the shower screen.
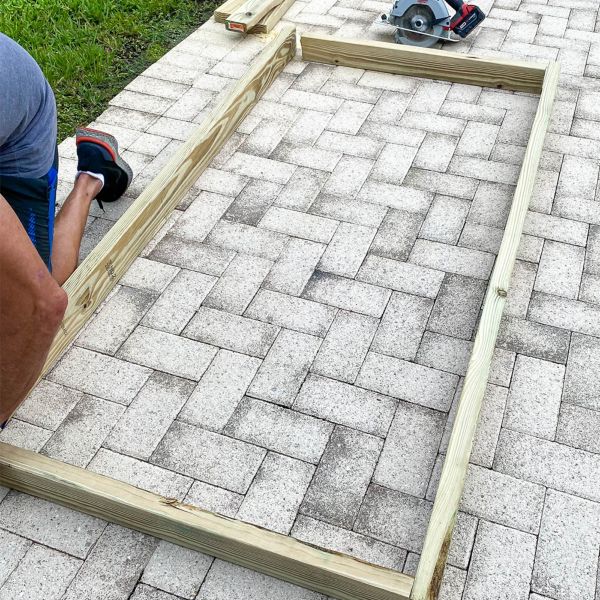
Screw
Screw together the four pieces using deck screws with a screw gun to make a rectangular frame.

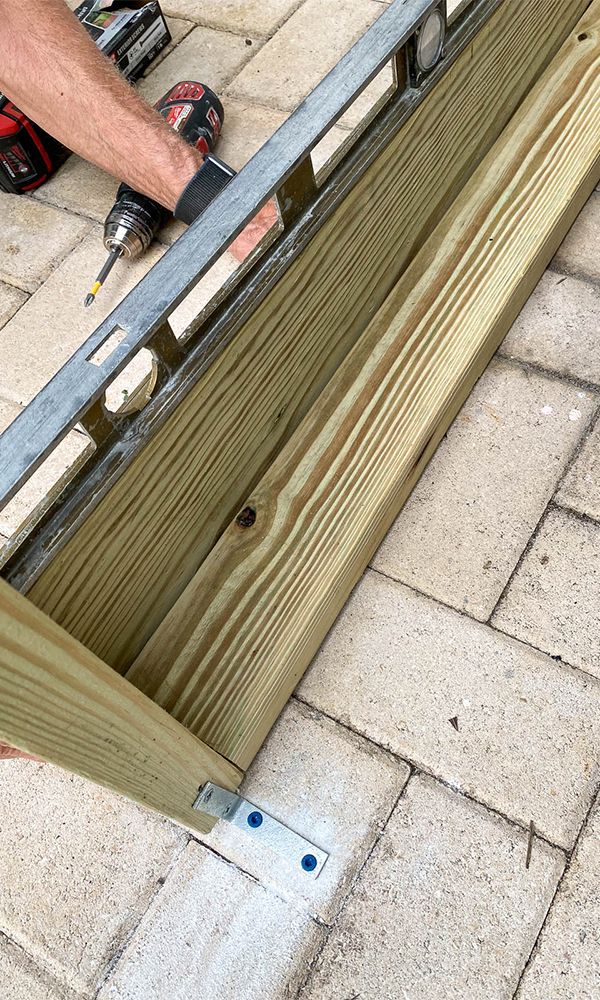
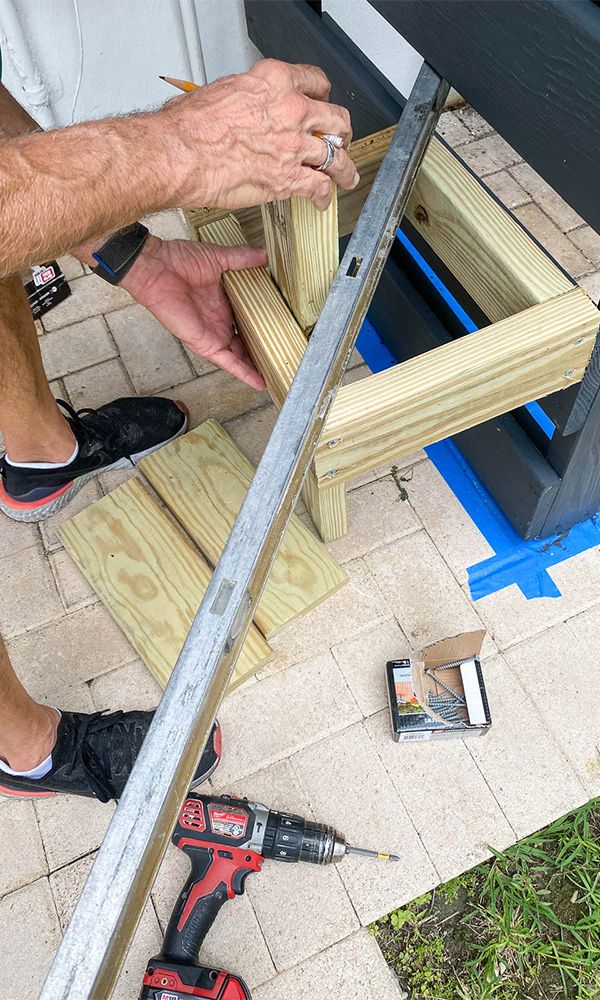
Location
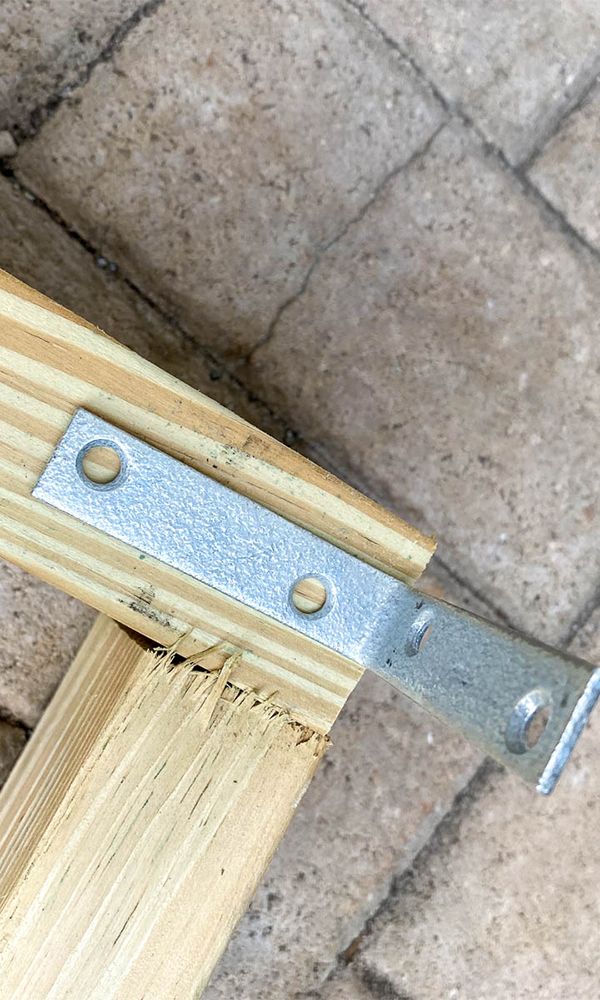
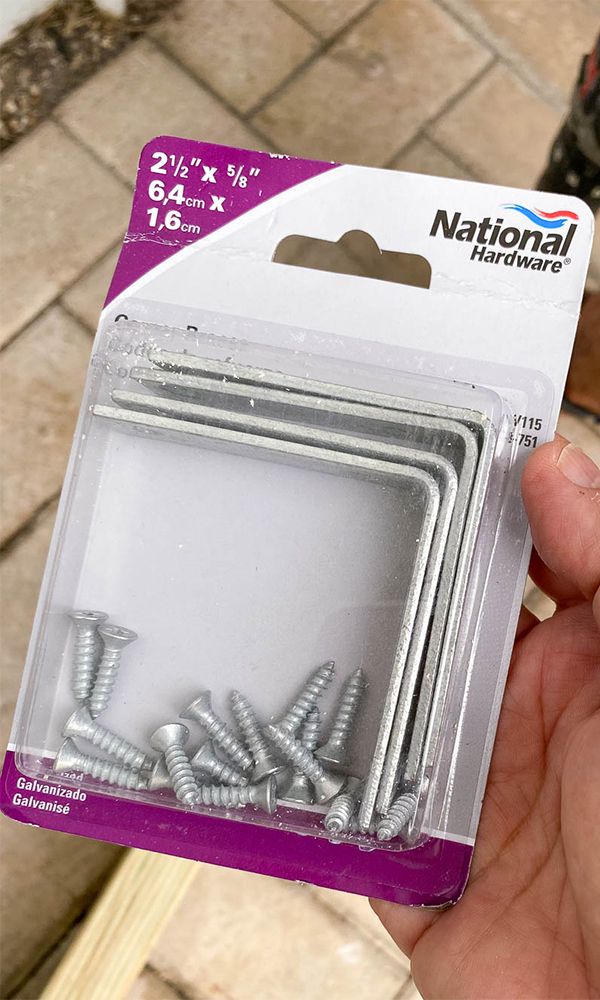
Attach
Attach the frame to the corner braces (angle brackets) with the screws provided in the package.
Cut
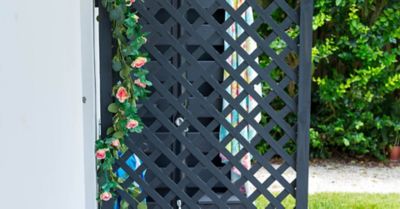
Cut fifteen 3' long planks from the decking wood. Decking wood has rounded edges which can be safer around wet surfaces. These planks will be used to create a shadowbox privacy screen.
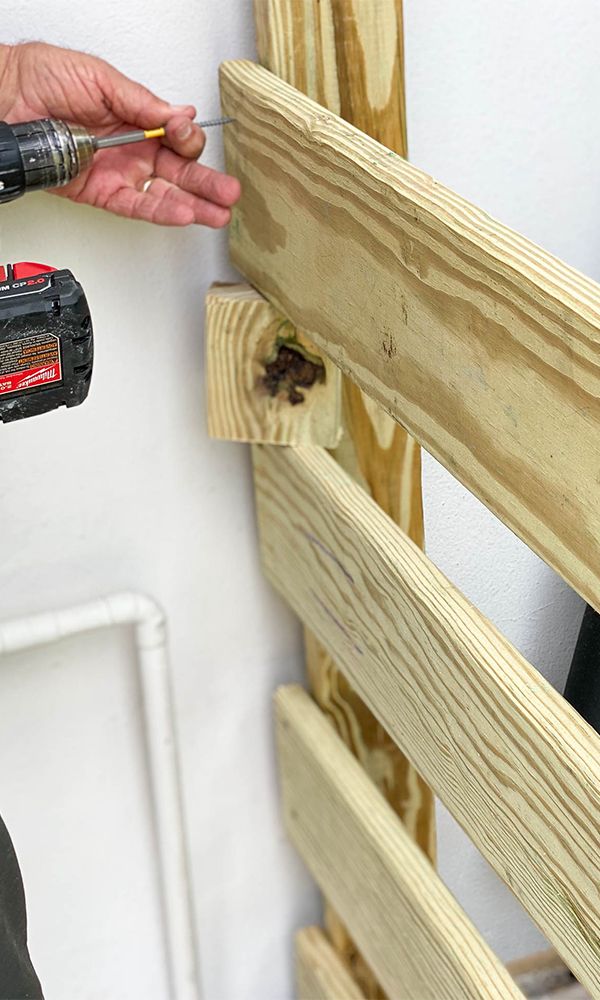
Attach
Attach one of the 3' long planks to the bottom (as shown). Make sure that this first piece is level to ensure that the entire screen will be level.
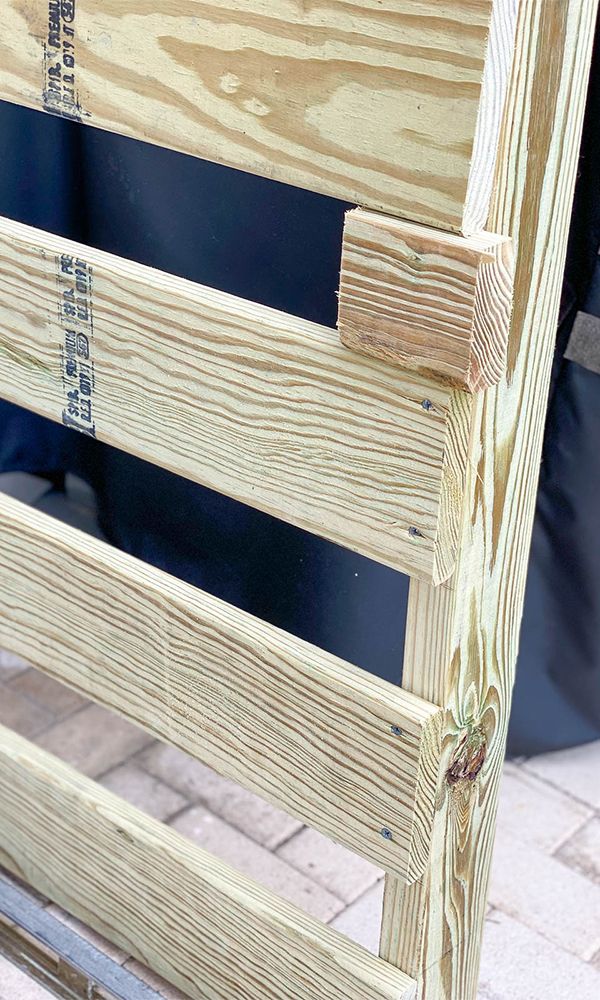
Measure
Measure and mark the locations for the attachment of the planks, leaving a four inch space between planks.
Cut
Cut a 4" block out of leftover wood. The block will help you to leave a 4" space between the planks as you install them. Using your screw gun, attach the planks to the frame. Build one side of the screen with this process and then repeat the procedure on the back side.
Optional Shower Seat
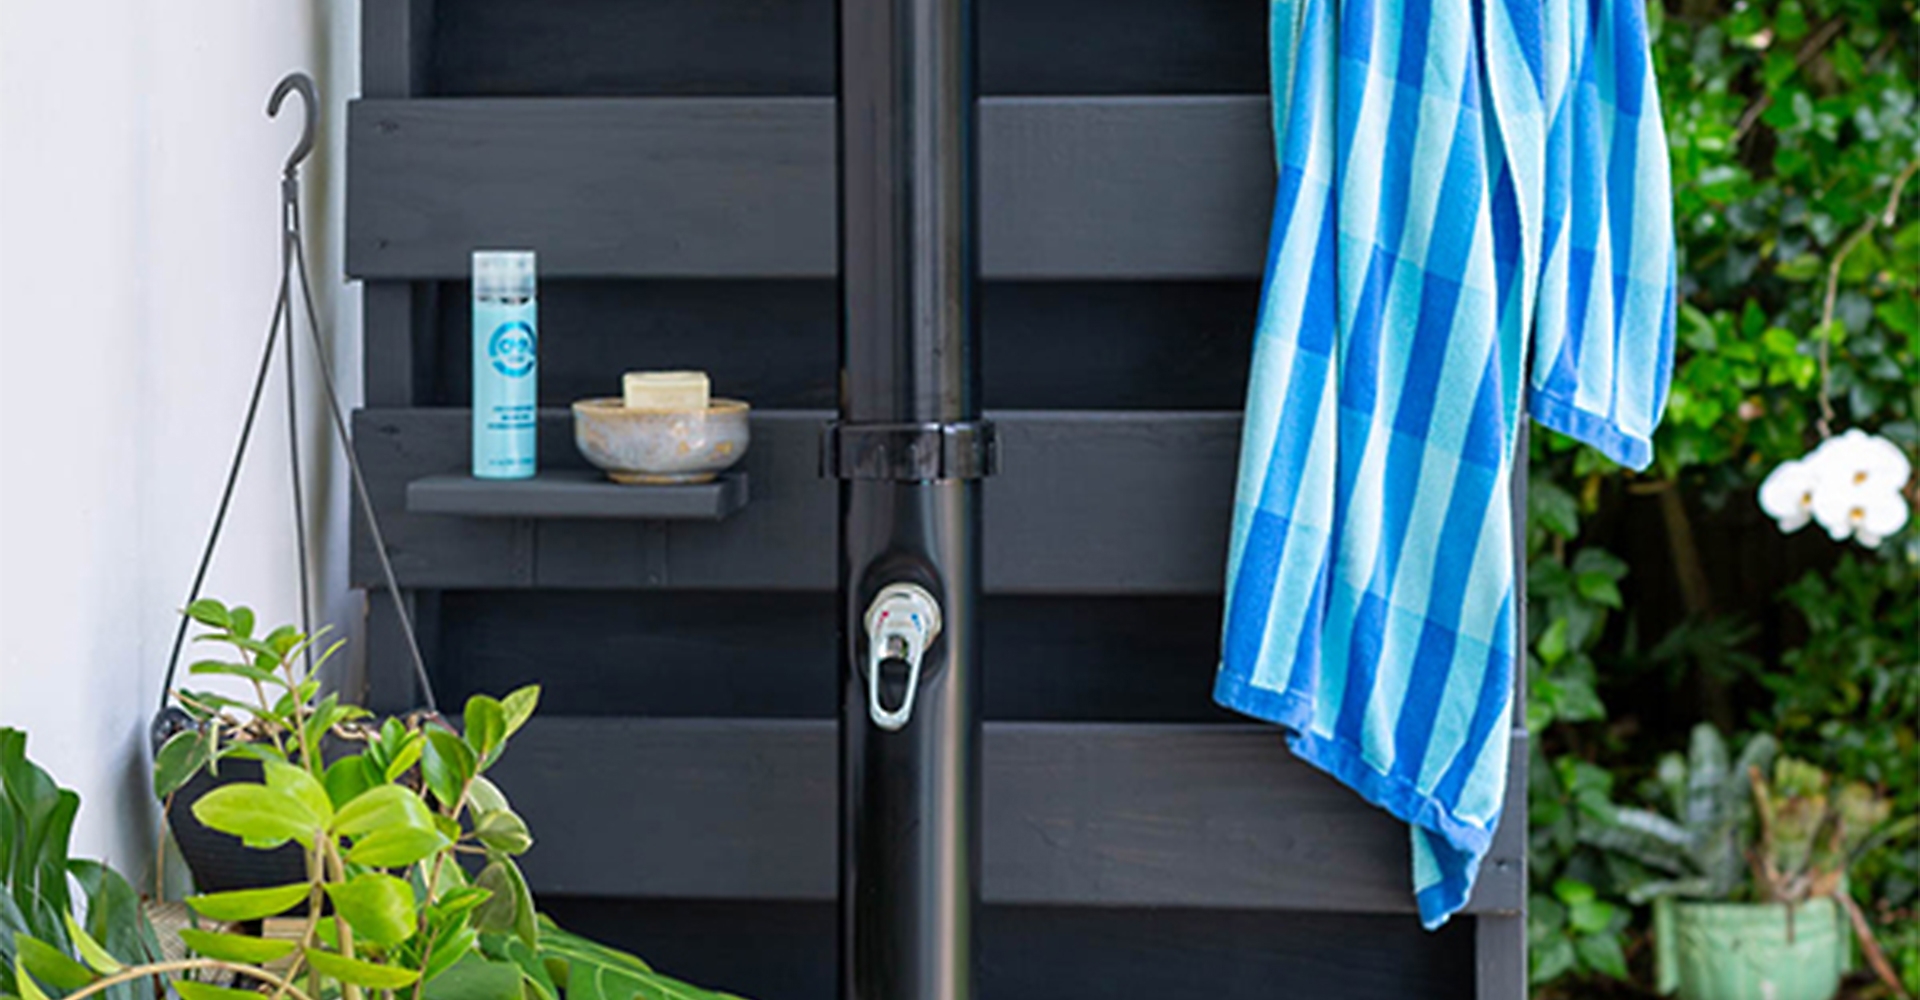
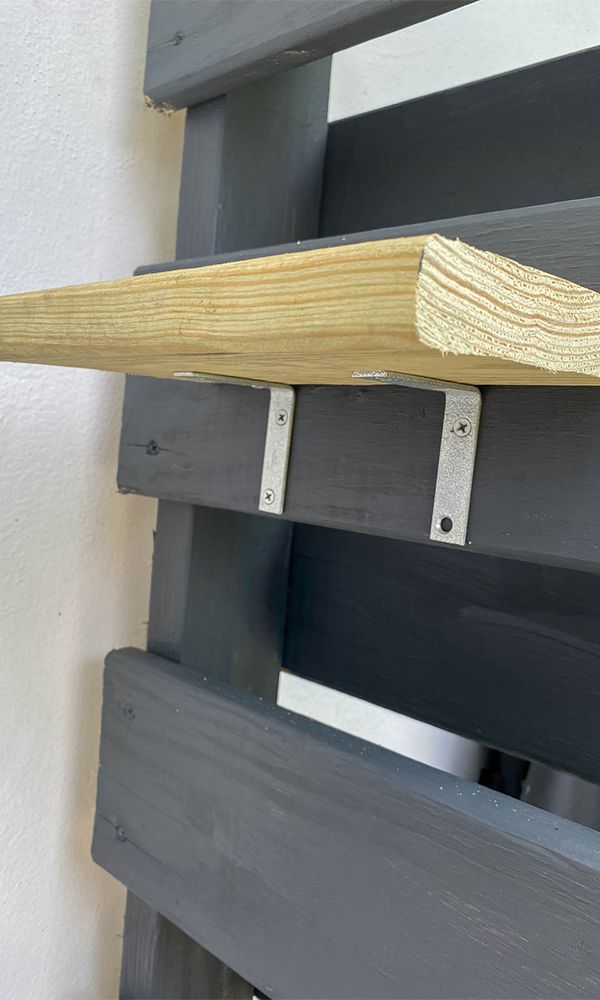
Optional Soap Shelf
Attach two National Hardware 2 1/2″ Corner Braces to the screen at your desired height for a soap shelf. Use a leftover 6” piece of the decking wood to make this shelf. Attach with enclosed screws.
Paint or Stain
Paint or stain the outdoor shower screen with exterior house paint, fencing paint or stain.

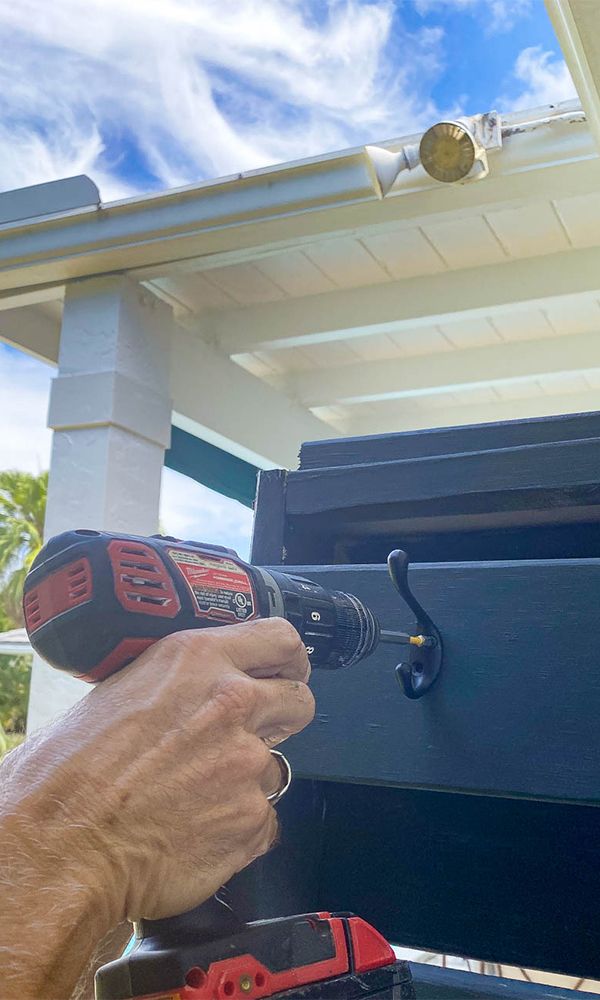
Towel Hooks
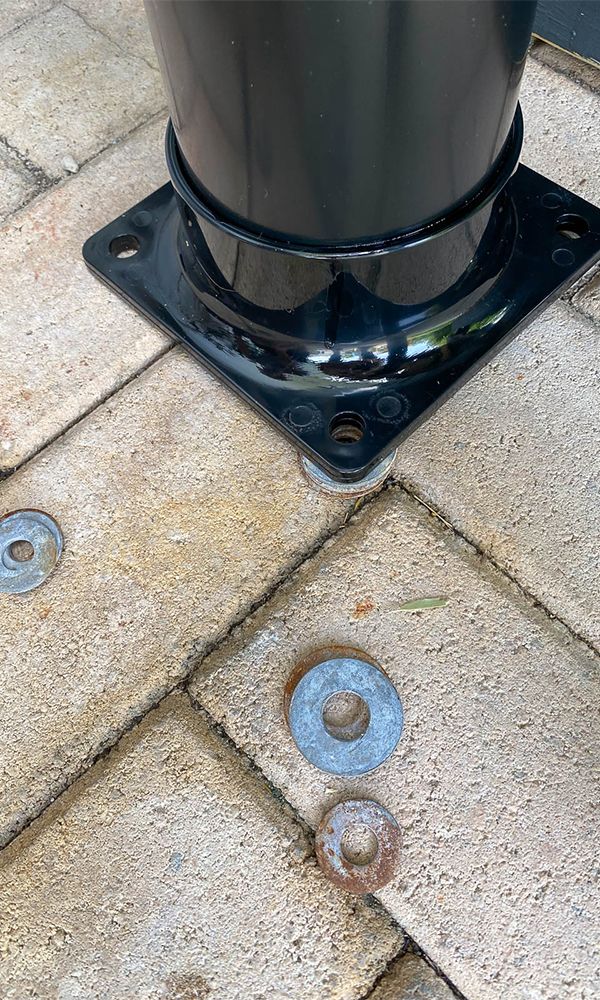
Install the Outdoor Shower
Hardware
- Related Product Categories:
- Metal Corner Braces & Brackets
- Reinforcement Hardware
- Hooks & Hangers
- Home Hardware